OK parts arrived. It is gonna be long afternoon 🙂
First I assembled the frame. Best is if you do not screw bottom board until you wire quadcopter. Otherwise you would had to dismantle it later.
Then you mount motors on the frame. Some use nylon straps, but I screw them on frame.
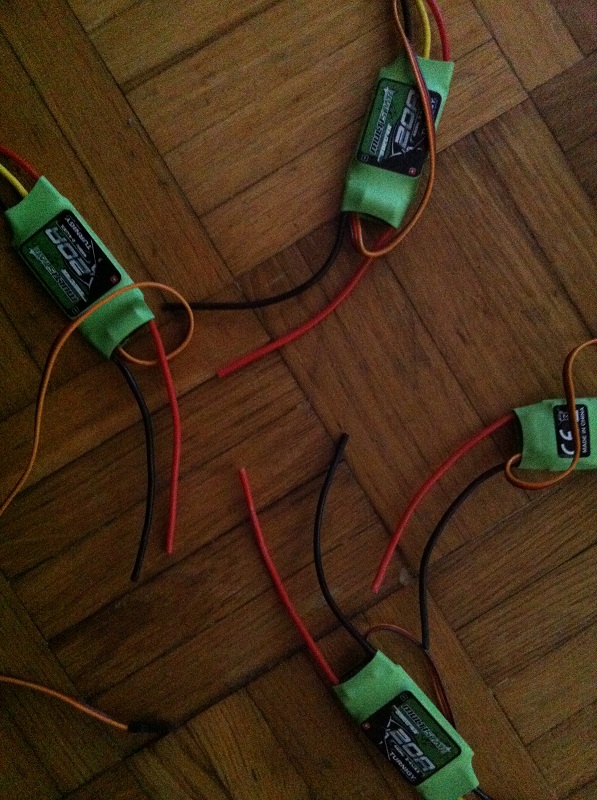
Next you have to put ESCs on the frame. Use again nylon straps.
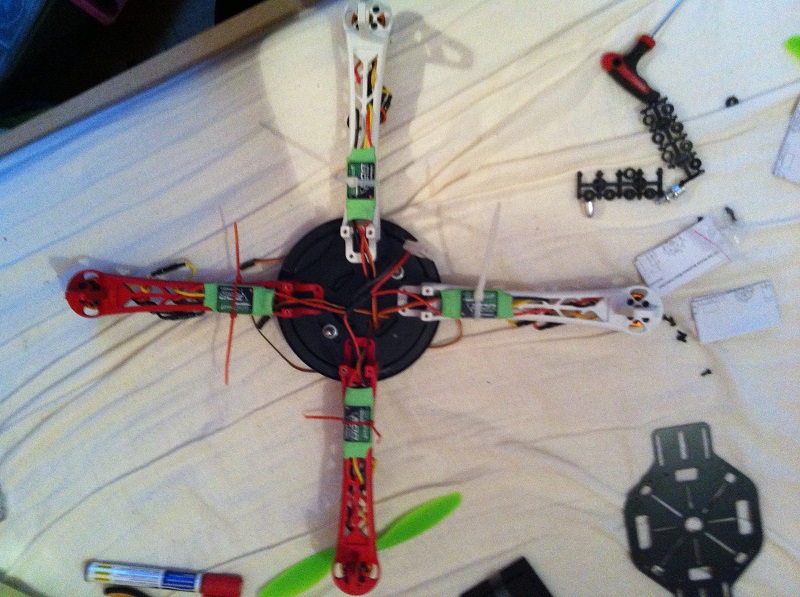
Because I didn’t buy power distribution board, I solder together all + and – terminals and battery connector. Check lenght of a wires, before you cut them! I bought battery connector in local store.
After wiring all ESC and motors it is time to mount kk board. I didn’t mounted directly on a frame. I mounted DVD cake on frame. If you are a beginner you will soon see, why is important to protect board and cables. And dvd cake fits perfectlly.
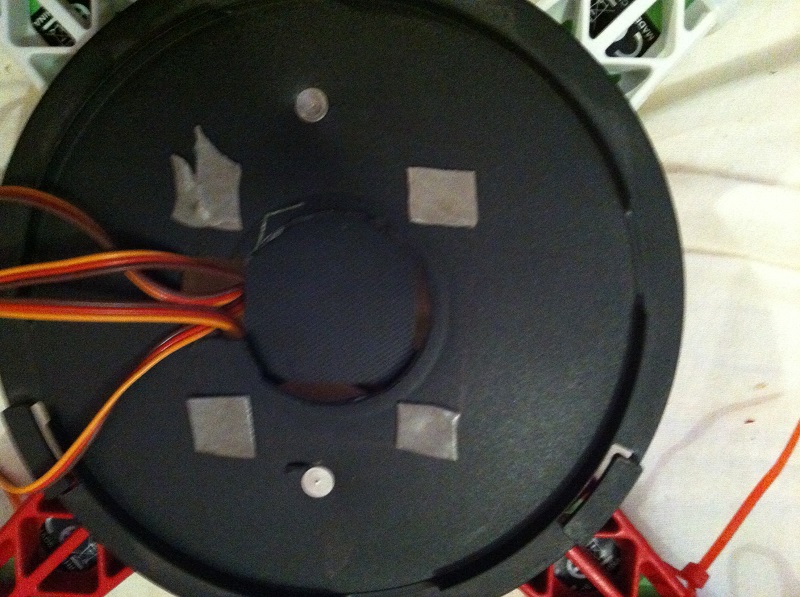
On a cake I mounted kk board. I used scotch outdoor tape. It is enough strong to hold everything in place.
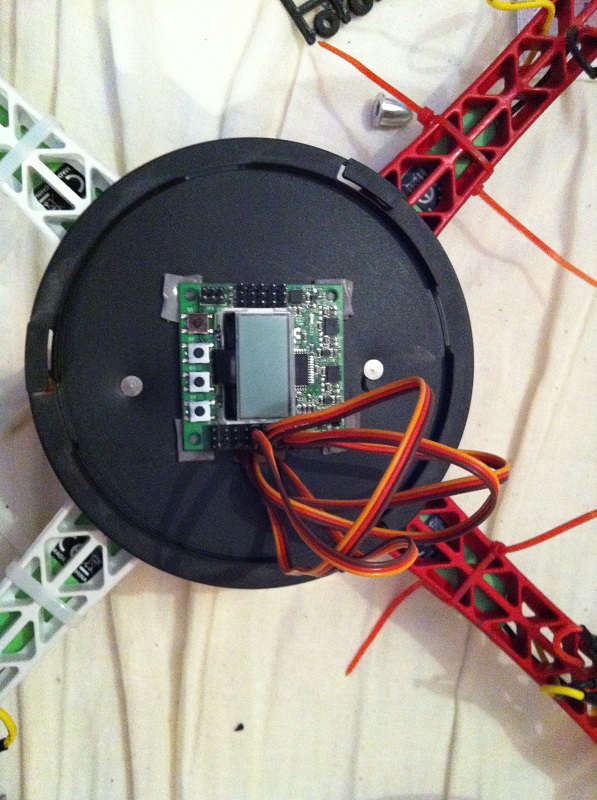
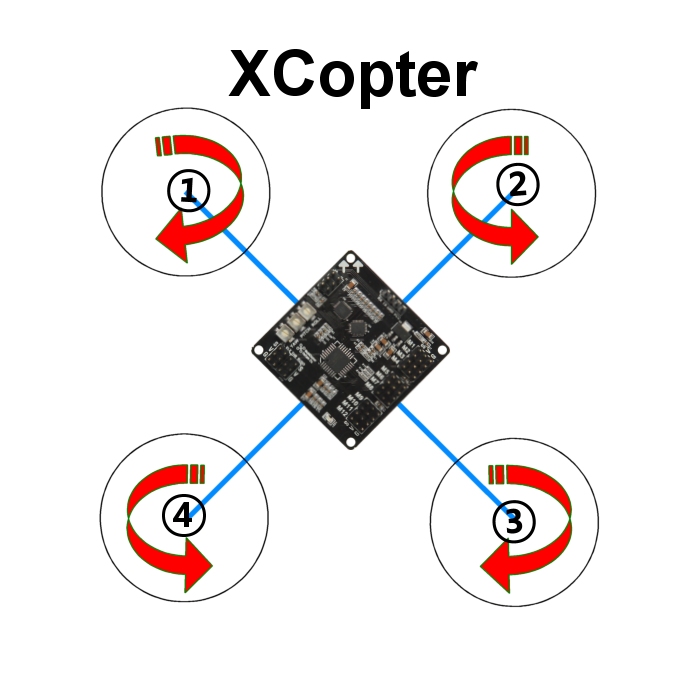
Then you connect ESC to the board. Check picture bellow how motors should spin. I used X configuration. READ KK board manual. It is very short, but very usefull. You can make a lot of damage to your quadcopter!!!
http://www.hobbyking.com/hobbyking/store/uploads/181270330X7478X47.pdf
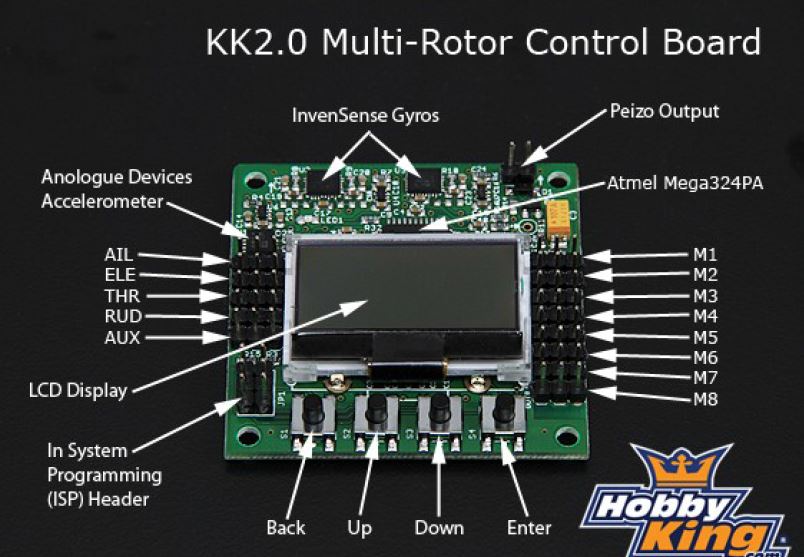
Check that brown or black wire on the ESC is on the outside of the board! KK board gets power from ESC! On the other side of the board you connect receiver.
Again use 3 pin receiver cables. Because if you don’t you can destroy board. I know that 😉 Check how is polarity on receiver!!!
After everything in place and connected, you can power up the board ( connect battery) Board will start up and on a screen you will see safe.
Now bind up receiver and transmitter.Then you can put on a frame bottom board. And do not attach propellers to the motors, this is the last step.
More in part 2 😉