Here is how you can bleed fuel system on an opel diesel engine without prepump. This is not a joke. This really works.

All you need is vacuum cleaner with exhaust port. It can save you a lot of time. I figure out this while I was working on a bosch vp44 pump and while I was replacing injector seals.


Car interior, trim wrapping

Posted: 19th January 2016 by viljem_r in Cars,bikes, vehicles, Garage, Start
Tags: , , , , , , , , , , , ,

I wanted more modern and colorful interior in my BMW. It looked a bit boring. So I bought blue carbon fiber vinyl from ebay and wrapped trims.

This is how it looked before wrapping.

X3 interior


Bmw X3 trim wrap

Bmw X3 trim wrap

Bmw X3 trim wrap

Bmw X3 trim wrap

Bmw X3 trim wrap

Bmw X3 trim wrap


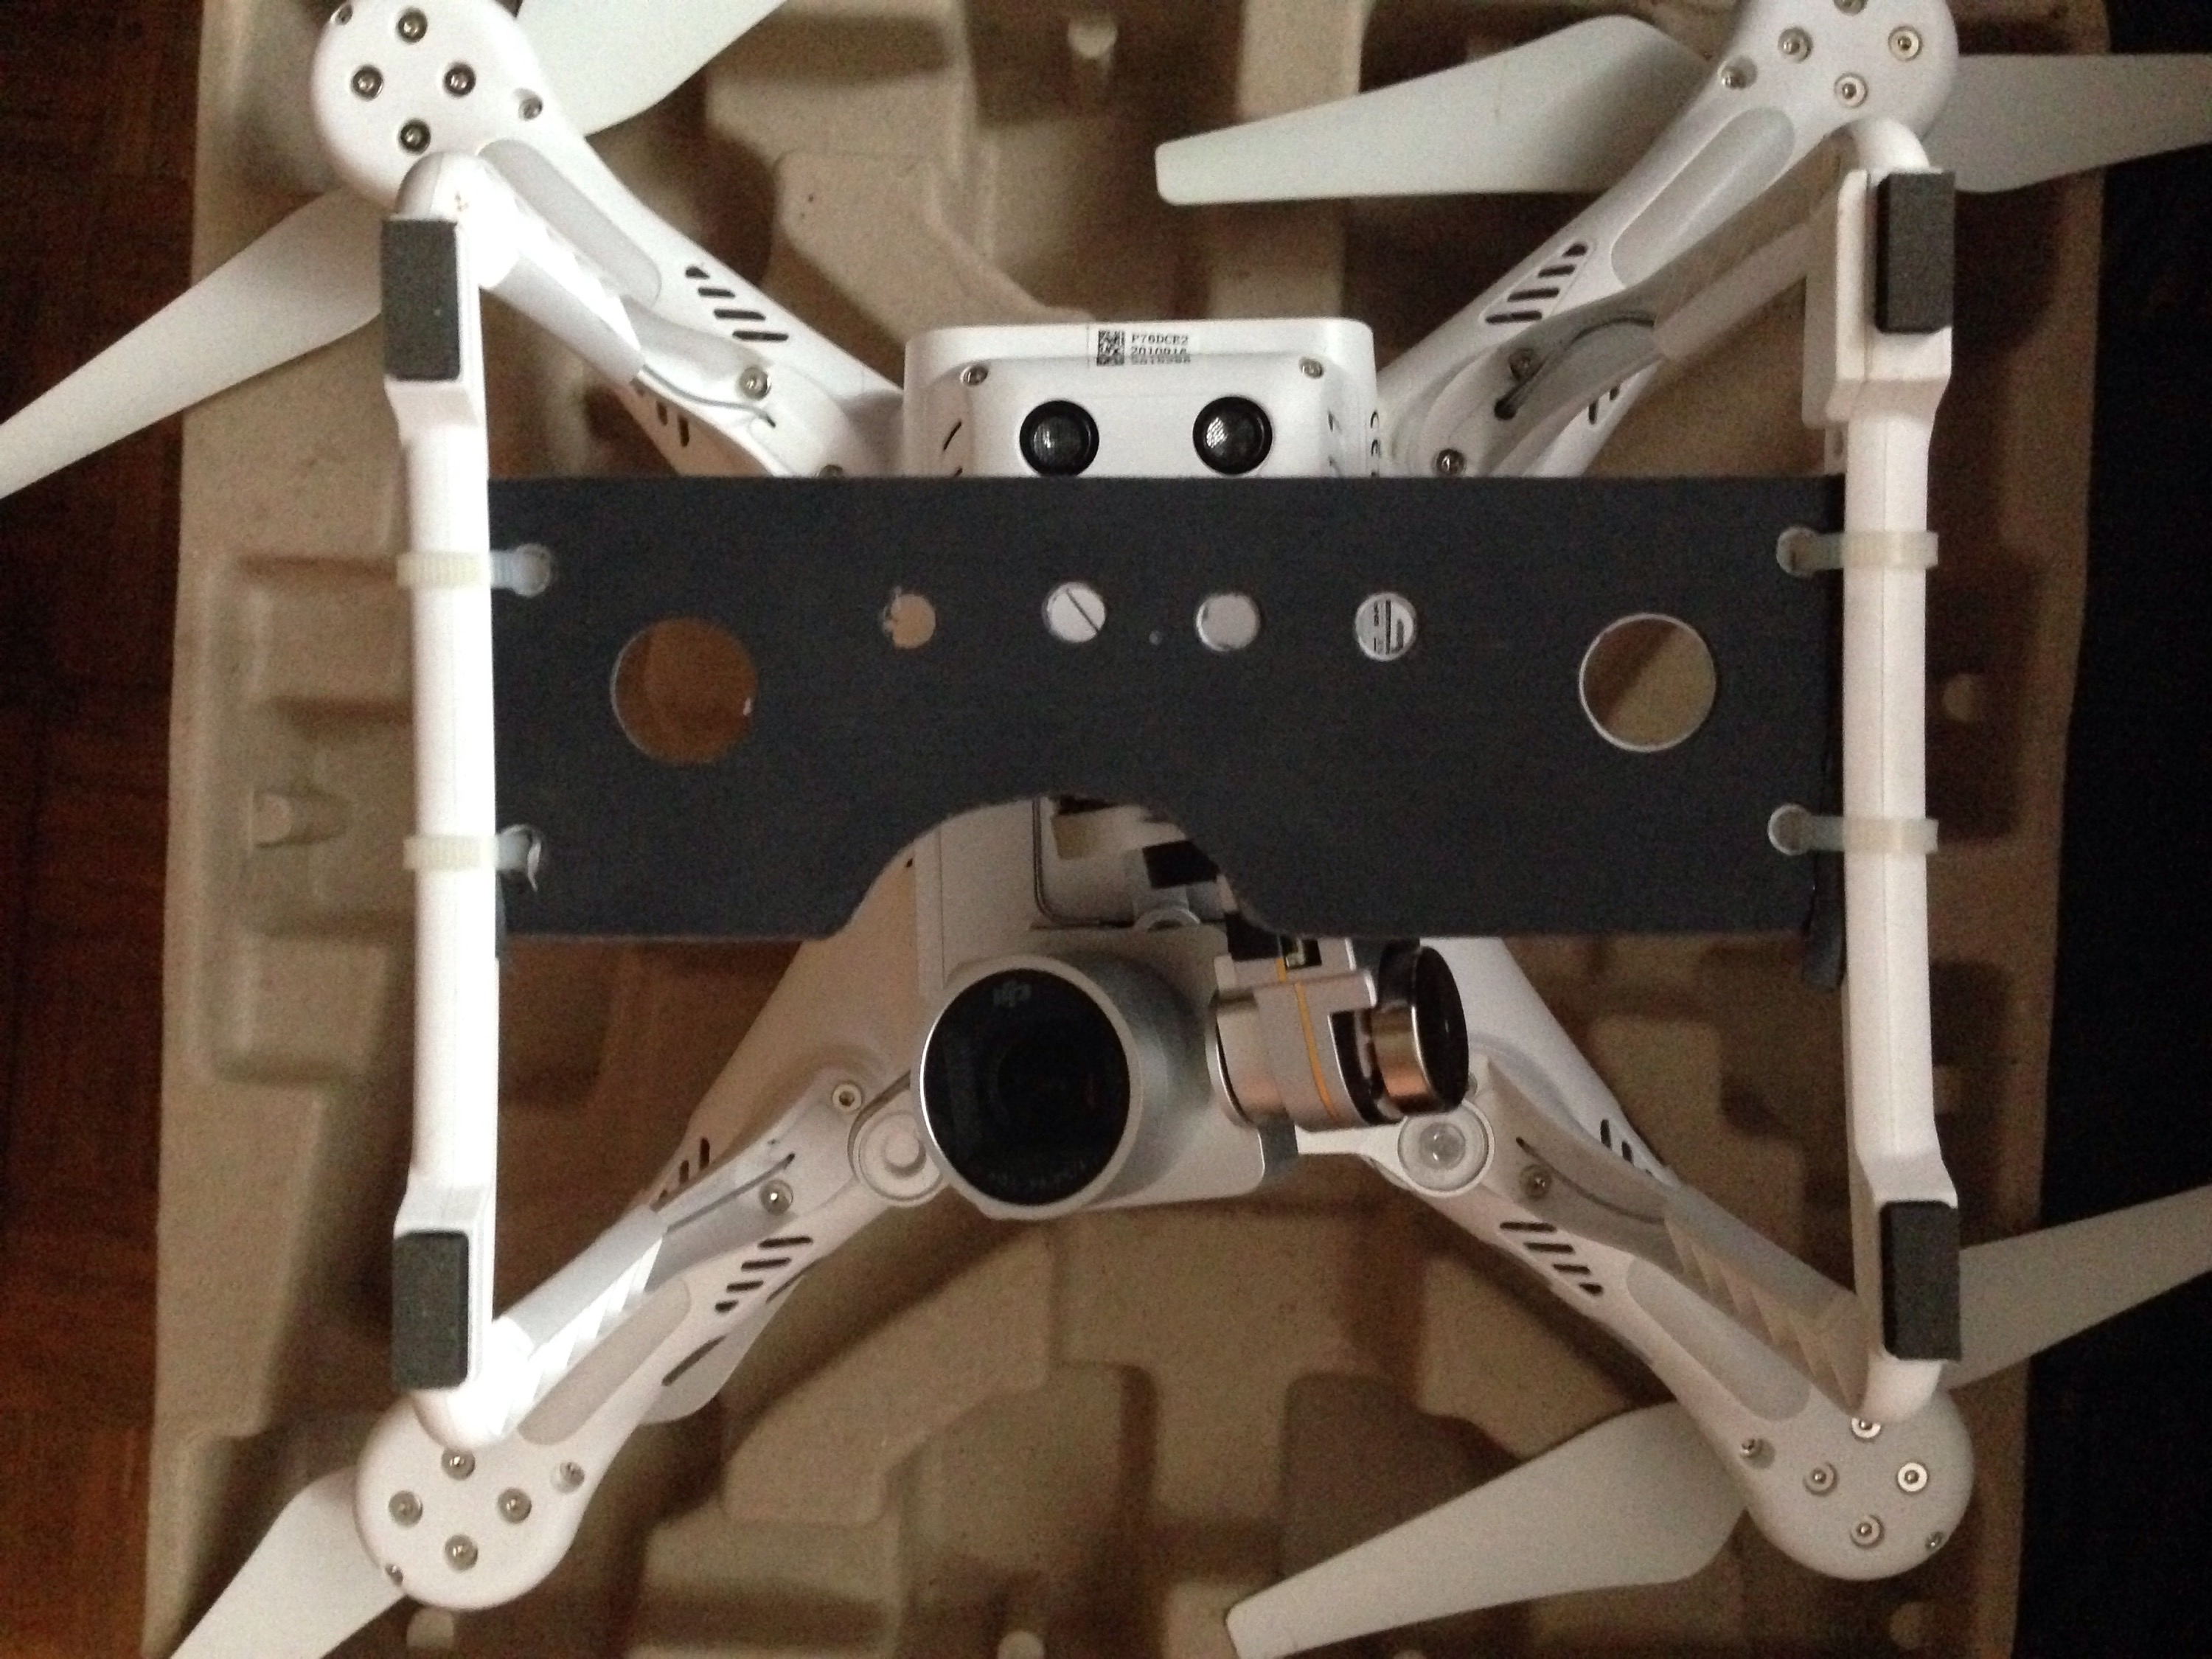
You can make your own gimbal protection in just 10 minutes. It is very usefull when you want to land somewhere on grass or  other terrain. It will protect your camera and gimbal.

I used old laptop cover for guard, cut it with grinder and sand it with paper. I also drilled some holes to be lighter.

There a lot of BMW diesel with that faulty preheating unit.

Here is how you can repair your BERU preheating unit. It is called also glow plug relay, but it is not relay any more, because it is not using anymore relays.

One indicator for this unit is if you connected to obd tester (inpa or autocom), you will see that all 4 or 6 (depending on number of cylinders)  glow plugs are intermittent or faulty. Usually there are not all 4 or 6 faulty.

If you want to check your glow plugs you will need to remove intake manifold. Resistance should be between 0-1 ohm. But you can checked them on modules connector. First disconnect it and than you will see 4 or 6 wires who are going to intake manifold. Put one on pin and one on the ground and check resistance. If all 4 or 6 are having resistance in range between 0-1 than it is something wrong with glow plug relay.

It is very hard to access. Module is located under oil filter.I think that module is located there, because copper is expensive so, they didn’t need long cables- cheaper production.

Bmw glow plug relay repair-preheating unit


Bmw glow plug relay repair-preheating unit

You will need to cut top cover, be careful.

Bmw glow plug relay repair-preheating unit


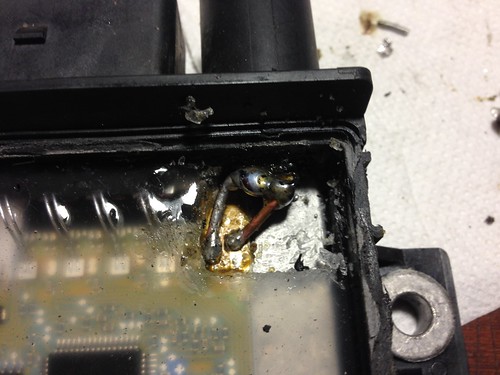
Here I noticed that small aluminium wires are burned or in really bad shape. This is main power supply for the module and plugs. And look how tiny wires are. German quality…

Bmw glow plug relay repair-preheating unit


I removed jelly silicone carefully with knife and screwdriver and tweezers.


Bmw glow plug relay repair-preheating unit


Bmw glow plug relay repair-preheating unit

Then I cleaned it with alcohol and slowly   sanded it  until I get to the copper.

You will need a lot of heat to solder terminals. You can remove pads from pcb, because they are soldered on pcb.


Bmw glow plug relay repair-preheating unit

With flux paste you can solder terminals.


Bmw glow plug relay repair-preheating unit

I used big copper wire and soldered it.

Bmw glow plug relay repair-preheating unit

Bmw glow plug relay repair-preheating unit

You can protect pcb with spray. It will be protected from water.

Bmw glow plug relay repair-preheating unit

After that I didn’t screwed it back in place. I tested it so I secure it with zip ties and connected ground cable on screw holes. Then I erased all errors with INPA tool.

Bmw glow plug relay repair-preheating unit


If modules works OK, then just seal it with silicone or better gasket sealent and avoid pcb board, because some silicones are conducted and they can cause you a lot of problems.

You can also check all remaining 4 or 6 wires if they are OK. Some are burned in modules.

Hope this post will help you  and save you 100 bucks.


If you want to do some coding on your bmw or just to check for errors you will need this tools. You can do a lot coding. All you need is obd2 adapter and laptop. You can buy it for aprox 15 eur.

Here is link to Bmw tools. Just install them on your windows xp or windows 7 os.

https://mega.nz/#!kAASwa7I!AJLVnnEBwLgzDPzBeQ4uQo60p1lbU2BsZofE-TBYGmk


Enjoy.


Testing 24 led 72 Led bar on atv

Posted: 22nd November 2015 by viljem_r in Cars,bikes, vehicles, Gopro, Start
Tags: , , , , , , ,

Here is how you can do alu arm guard from alu sheet. I had 2mm thick sheet. It is very usefull when you are driving on snow or mud.

Atv arm guard


After I cut it with grinder, I shaped it with hamers. Use torch to heat up aluminium, it will be shaped easily.


Atv hand guard

Atv arm guard


Atv hand guard


Atv arm guard


Atv arm guard


And here is finished guard.

Atv arm guard


On arms I welded brackets with  holes so I can mount guard with m4 screws.

Atv

Atv


Atv hand guard

Stock lights on atv are not producing enought light at night. So if you are driving offroad at night you will need good extra light. One good alternative is Led bar. Installation is quite simple and light is very bright.

You will need led bar, some wiring harness, relay 15 amps, fuse 10 amps, switch. I already had that installed.

Here you can see  installation on my atv:

Led bar installation on atv

Instructions:

Led bar installation on atv

Assembling mounts:

Led bar installation on atv


checking how led bar would fit:

Led bar installation on atv


Relay wiring:

Led bar installation on atv

Checking how bright it is:


Led bar installation on atv


Creating mount for led bar:

Led bar installation on atv

Led bar installation on atv


Mount painted with can spray:

Led bar installation on atv

And here is how led bar looks installed on atv:

Led bar installation on atv

First thing you should check in your old car is your ignition system. This causes majority problems in your car. Check spark plugs, replace damaged cables,worn out brakers and ignition coil. You will see and hear  improvement immediatlly.

If you want more power, better millage and smoother engine in your oldtimer, than you must upgrade your ignition system with this module. You won’t have zero  maitenance after this upgrade.

Basicly you replace breakers and capacitor with transistor module. Sometimes it’s called electronic ignition. You will still have brakers in your distributior, but they will be only used as a sensor. That means they won’t wore out, because current through them will be very small. You will also have stronger spark. Ignition is more precise and you won’t need to replace spark plugs so often.

You can make your module yourself or you can buy it. I made a lot of modules in a past and all worked fine. Because I don’t have a lot of time I bought welleman kit,. It costs me 13 euros. Still cheap.

You receive in this kit everything you need including instructions. You just solder all components on pcb board and put it in case.

Electronic transistored ignition module

It will take you about one hour. Just be carefull to solder all components at right place and check if you have 6v or 12v electrical system in your car.

Electronic transistored ignition module

Electronic transistored ignition module

Electronic transistored ignition module

Electronic transistored ignition module

I bought plastic case for 3 eur. Make sure it will be water proof.

Electronic transistored ignition module

Here is schematic of module if you want to make it yourself.

Electronic transistored ignition module

I will installed in Opel Kadett 1976. I already tested it and engine runs more smoothly. Maybe I will also replaced distributor with newer version without brakers or bought this item on picture below.

Electronic ignition conversion kit replaces points and condenser. Never adjust points or timing again!


I will upload more pictures later with information how to wired it.


Here second part of my build:

I made mounts for radio from aluminiun:

Bmw x3 2 din stereo fascia

Bmw x3 2 din stereo fascia

Then testing how fascia fits in with radio.

Bmw x3 2 din stereo fascia

Bmw x3 2 din stereo fascia

Bmw x3 2 din stereo fascia

Bmw x3 2 din stereo fascia

Bmw x3 2 din stereo fascia

And finally time for fiberglass, I wraped frame with thick shirt.

Bmw x3 2 din stereo fascia

Bmw x3 2 din stereo fascia

Bmw x3 2 din stereo fascia

Then put some fiberglass on with brush.

Bmw x3 2 din stereo fascia

Bmw x3 2 din stereo fascia


After it dried I put another layer of  fiberglass mat.

Bmw x3 2 din stereo fascia

Time for car body filler, I applied  aprox 3 layers of body filler. So I got rid off all dents and holes.

Bmw x3 2 din stereo fascia

Bmw x3 2 din stereo fascia

Bmw x3 2 din stereo fascia

Then sanding fascia with sand paper until is smooth

Fascia bmw x3

Then I applied plastic primer


Fascia bmw x3

Fascia bmw x3


Applying a primer.

Fascia bmw x3

Water sanding a primer until is really smooth and shinny

Fascia bmw x3

Fascia bmw x3

Next is panting fascia. First I painted with black paint and after it dried a used matte black paint.

Fascia bmw x3

Fascia bmw x3


Here is final product mounted in car.

Fascia bmw x3

Fascia bmw x3


You can see more pictures here:

https://flic.kr/s/aHskkM6MXJ


If you want to learn more about fiberglass:

http://www.wikihow.com/Fiberglass

More about car filler:

http://www.mig-welding.co.uk/body-filler.htm